Get started
From an existing schema to tables you change by editing a file, in about ten minutes. You need a Databricks workspace with Unity Catalog, a SQL warehouse, and a schema you may change: a dev catalog is the place to start.
Already have an Asset Bundle?
Start at With an Asset Bundle instead: stevin reads your
databricks.yml — its targets, workspaces, variables and the schemas it declares —
so you write none of it twice.
1. Install
No uv? pipx install --pip-args=--pre stevin works too; Installation
has every option. The --prerelease flag is there because every release so far is an
alpha.
2. Connect
stevin uses the Databricks SDK's authentication, so whatever works for the Databricks CLI works here. The quickest way is three environment variables:
export DATABRICKS_HOST="https://dbc-1234abcd-5678.cloud.databricks.com"
export DATABRICKS_TOKEN="dapi…"            # User settings → Developer → Access tokens
export DATABRICKS_WAREHOUSE_ID="1a2b3c4d5e6f7a8b"
The warehouse id is the last part of the warehouse's HTTP path: open SQL Warehouses,
pick one, and look under Connection details for /sql/1.0/warehouses/1a2b3c4d5e6f7a8b.
A 2X-Small serverless warehouse is plenty.
Rather use the Databricks CLI's login?
databricks auth login --host https://… --profile dev, then add
--profile dev to the import below — it writes the profile into the project, so
you never type it again.
Something not working?
stevin doctor checks the connection, the warehouse, the metastore's quota and
the rest, and says what to do about whatever isn't right. It changes nothing.
New workspace, or a fresh runtime?
stevin verify --schema main.scratch runs the Databricks behaviour every plan
rests on against your workspace, in a schema it makes and drops, and says which
holds. See verify.
3. Import a schema
Start in an empty directory and import a schema whose tables you'd otherwise manage by
hand — here main.crm:
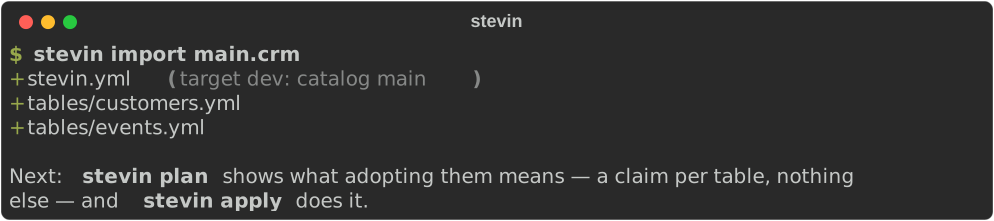
That wrote one spec per table, view and function, and a stevin.yml with one target,
dev, whose catalog is the one you imported from:
# yaml-language-server: $schema=https://kostavo-oss.github.io/stevin/schema/project.json
# Written by `stevin import`. Every key is explained at
# https://kostavo-oss.github.io/stevin/spec/#the-project-file
version: 1
specs: [tables]

# Where `apply` records its runs and holds its lock; created on first use.
history_schema: ${catalog}.stevin

targets:
  dev:
    vars:
      catalog: main
# yaml-language-server: $schema=https://kostavo-oss.github.io/stevin/schema/spec.json
table: ${catalog}.crm.customers
comment: One row per customer
columns:
- name: customer_id
  type: bigint
  nullable: false
- name: email
  type: string
  comment: Primary contact
- name: country
  type: string
grants:
- principal: analysts
  privileges:
  - SELECT
Specs say ${catalog} rather than main, so the same files serve another catalog later:
add a target with its own catalog, and pick it with -t.
4. Plan, then apply
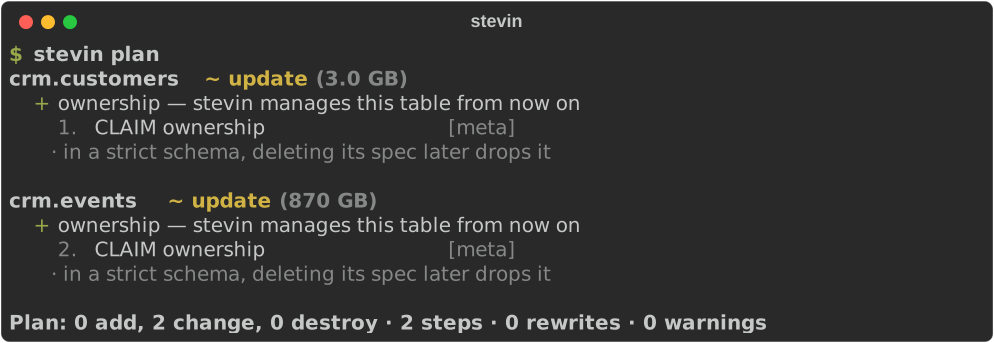
plan compares the specs with what's live. Straight after an import they match, so the
only thing to do is claim the tables — mark them as stevin's, which is what lets it
manage them from now on:
apply plans the same thing, shows it, and asks before it changes anything:
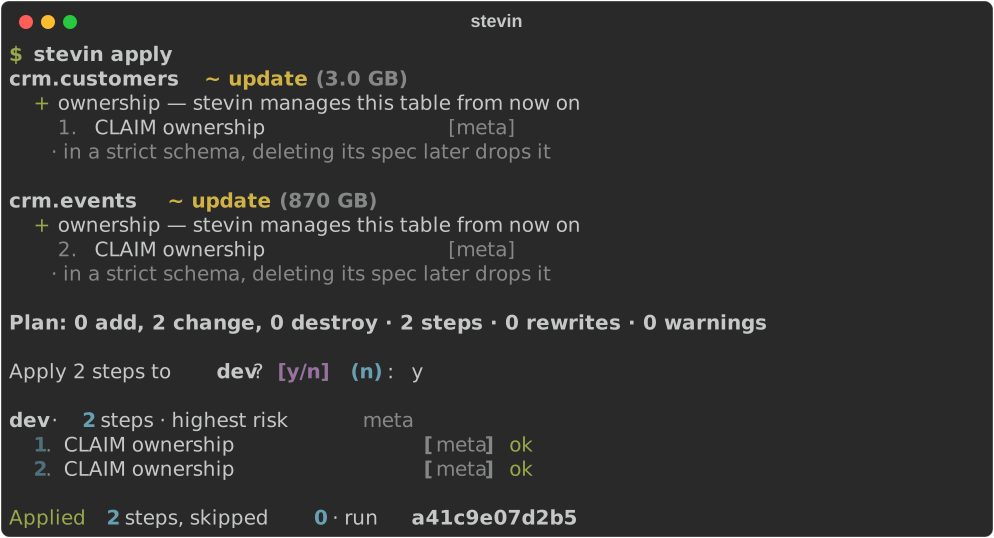
apply keeps a record of every run in main.stevin — the history_schema in
stevin.yml — and creates that schema the first time, so you need permission to create a
schema in the catalog.
5. Change a table by editing its spec
Here's the point of it. Add a column to tables/customers.yml:
and apply again:
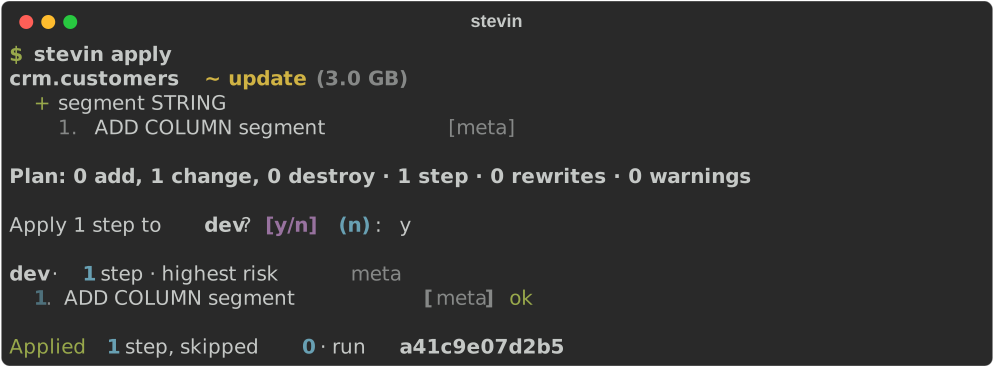
No notebook, no ALTER TABLE to write, and the next person reads the table's shape from
one file. A new table is a new spec file; a rename is renamed_from; a type that can't
change in place is rebuilt with its data — the plan always says which, and what it costs,
before anything runs.
Where next
- A tour — every command, from an empty catalog to a reviewed pull request.
- Feature gallery — each kind of change, with its spec and its plan.
- In CI — plan every pull request, apply on merge.
- Writing a spec — the full reference.
- Safety model — what stevin will and won't do to your tables.